Posts

Showing posts from September, 2017

Yoga

Image
Yoga  Basic Yoga: Understand Yoga For Good Health Understanding even basic yoga principles is not easy for a beginner. Yoga is a complex discipline and it may take years for a person to perfect it. Yogis are the persons who devote their entire life to practice of yoga. Yogis even in their eighties can surprise you with their firm posture, glowing texture of their skin and their flexibility to perform yoga asanas. Fortunately, basics of yoga are really simple. Yoga is a practical discipline to be followed. As a beginner you can start with a very simple yoga sequence. You can start slowly and then progress at your own pace. A beginner to yoga should not start with rigorous exercises or difficult poses. Set your own goals after you feel positive effects of yoga in your life. Even following a few simple asanas and pranayama can help you to save thousands on your doctor's bill. Who Can Do Yoga? There is no age limit for practice of yoga . Any body who is in good health fr

Amla candy

Image
Amla Candy  Amla Candy Amla candy is an amazing dessert recipe that is loved by the kids. You might have purchased amla candy in the market, but we will tell you how to make it at your own home and you will never need to buy it again. The kid friendly Indian candy is high on vitamins and minerals, so it is probably the only candy with loads of goodness. Made with easy boiling of amla, this recipe won't take much time to make if ingredients are ready. You can store dried amla for many days with this recipe. Learn how to make it with our step by step guide.   Method 1. Wash and dry gooseberry with kitchen towel. 2. Make in the gooseberry. 3. Amla Candy: 4. Boil enough water in a vessel, add gooseberry, boil for 2 minutes and drain excess water. 5. Cut the gooseberry in slices. 6. Add cumin powder and dried ginger powder over the top. 7. Cover it with sugar, close the lid and set aside. 8. Next day slices will float in sugar water. 9. On the third day slices will settle at bot

food lab info

Image
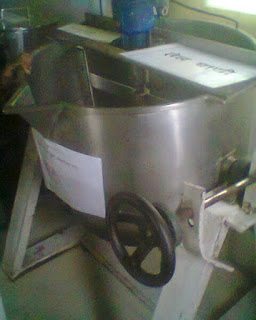
Informetion Of Food Lab                            Heatting Kettel                          Electronic Mixer                  Nitrogen Gas Packing Machine                           Packing Machine                              Dryer                            Fruite Palper Machine                                                    Fealler Machine                              Avla Cutter  Bootle Cap Machine                                                                             Microven 

Blood Presser

Image
Blood  Presser Sphygmomanometers There are three types of  sphygmomanometers used to measure blood pressure: mercury, aneroid, and digital. Reading blood pressure by auscultation is considered the gold standard by the Heart, Lung and Blood Institute of the NIH.   Subject Position: supine, seated, standing. In seated position, the subject's arm should be flexed. The flexed elbow should be at the level of the heart. If the subject is anxious, wait a few minutes before taking the pressure. Procedures To begin blood pressure measurement, use a properly sized blood pressure cuff. The length of the cuff's bladder should be at least equal to 80% of the circumference of the upper arm. Wrap the cuff around the upper arm with the cuff's lower edge one inch above the antecubital fossa. Lightly press the stethoscope's bell over the brachial artery just below the cuff's edge. Some health care workers have difficulty using the bell in the ant

Hemoglobin

Image
Hemoglobin  Principle Blood is mixed with an   acid  solution so tha t  hemoglobin   is converted to brown-colored acid hematin. This is then diluted with water till the brown color matches that of the brown glass standard. The hemoglobin value is read directly from the scale. Equipment (1) Sahli’s hemoglobinometer: This consists of Sahli’s graduated hemoglobin tube (marked in grams and percent) and a comparator with a brown glass standard. (2) Sahli’s pipette or hemoglobin pipette (marked at 20 μl or 0.02 ml). (3) Small glass rod (stirrer). (4) Dropping pipette. Reagents (1) N/10 hydrochloric acid (2) Distilled water Specimen:  EDTA-anticoagulated venous blood or blood obtained by skin puncture. Method (1) Place N/10 hydrochloric acid into Sahli’s graduated hemoglobin tube up to the mark of 2 grams. (2) Take blood sample in Sahli’s pipette exactly up to 20 μl mark. Blood adhering to the exterior of the pipette is wiped away using absorbent paper or

Blood Group Test

Image
Blood Group Test  Blood typing procedure: 1. Mix! First mix the patient's blood with three different reagents including either of the three different antibodies, A, B or Rh antibodies! 2. Look for agglutination! Then you take a look at what has happened. In which mixtures has clumping, or agglutination, occurred? The agglutination indicates that the blood has reacted with a certain antibody and is therefore not compatible with blood containing that kind of antibody. If the blood does not agglutinate, it indicates that the blood does not have the antigens binding the special antibody in the reagent. 3. Figure out the ABO blood group! Start by taking a look at the test tubes containing A and B antibodies. Has the blood agglutinated in either of these two tubes? No agglutination in test tube A, indicates that the patient's red blood cells do not have A antigens. Agglutination in the tube containing B antibodies indicates that the patients' red blood

Oil Peller Machine

Image
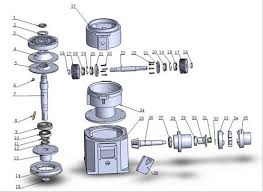
Oil Peller Machine Peanut oil press machine is a kind of screw oil press. Peanut oil press functions through mechanical pressure that oil can be squeezed out of oil crops in high pressure to achieve  Peanut oil press machine is a kind of screw oil press. Peanut oil press functions through mechanical pressure that oil can be squeezed out of oil crops in high pressure to achieve the purpose of oil pressing. Squeezed crude oil is edible after being filtered by the vacuum oil filter.

Cake

Image
Cake   Ingredients  200g sugar 115g butter 2 teaspoons vanilla extract 200g flour 1 3/4 teaspoons baking powder 120ml milk Directions Preheat the oven to 180 degrees C. Grease and flour a 23cm tin or line a bun tray with paper cases. In a medium bowl, cream together the sugar and butter. Beat in the eggs, one at a time, then stir in the vanilla. Combine flour and baking powder, add to the creamed mixture and mix well. Finally stir in the milk until the mixture is smooth. Pour or spoon mixture into the prepared tin or bun cases. Bake for 30 to 40 minutes in the preheated oven. For fairy cakes, bake 20 to 25 minutes. Cake is done when it springs back to the touch.

Nankets

Image
Nankets  Recipe source: All purpose flour-1 cup Ghee-1/2 cup Sugar-1/2 cup Salt a pinch Cardamon powder-1/4 tsp Cashew nuts- 2 tbsp(chopped) Pistachios for garnish(chopped) Method of Preparation : 1. Sift all purpose flour, cardamon powder and salt,  set aside.Grind sugar to smooth powder using a grinder. 2. Cream ghee and powdered sugar until creamy. 3. Mix flour little by little with creamy mixture using a spoon. 4. Add chopped nuts to the mixture and mix together with hand. 5. Make balls using the dough and place them in a baking sheet with baking paper spaced apart.Softly press the balls and place the pista on top with a gentle press. 6. Bake for 15 min at 350 F.The cookies doesn't have to color.

Coconut barfi

Image
coconut  barfi  INGREDIENTS (1 cup = 250 ml) 1   tablespoon   ghee 2   cups   tightly packed fresh grated coconut 1   cup   khoya   (mawa or evaporated milk solids) grated or crumbled 1.5   cups   milk 1   cup   sugar   or add as required ½   teaspoon   cardamom powder   (choti elaichi powder) 1   tablespoon   chopped pistachios   (pista) 1   pinch   saffron strands   (kesar) HOW TO MAKE RECIPE keep all the ingredients ready for making coconut barfi. grease a tray or thali and place aside. we will use the greased dish to set the coconut barfi. heat 1 tablespoon of ghee in a heavy bottomed pan or kadai. add 2 cups of tightly packed fresh grated coconut. stir well and saute for 3 to 4 minutes on a low flame. the sauteing is done to reduce the moisture  from the coconut. don't brown the coconut.  add 1.5 cups of milk. mix and stir well. simmer for 2 minutes on a low flame. then add 1 cup sugar or as required. mix very

Pop-corn

Image
pop-corn Ingredients 3 Tbsp coconut, peanut, or canola oil (high smoke point oil) 1/3 cup of high quality popcorn kernels 1 3-quart covered saucepan 1 Tbsp or more (to taste) of butter (optional) Salt to taste Method 1  Heat the oil in a 3-quart thick-bottomed saucepan on medium high heat. If you are using coconut oil, allow all of the solid oil to melt. 2  Put 3 or 4 popcorn kernels into the oil. 3  When the kernels pop, add the rest of the 1/3 cup of popcorn kernels in an even layer. Cover,  remove   from heat a nd count 30 seconds. (Count out loud; it's fun to do with kids.) This method first heats the oil to the right temperature, then waiting 30 seconds brings all of the other kernels to a near-popping temperature so that when they are put back on the heat, they all pop at about the same time. 4  Return the pan to the heat. The popcorn should begin popping soon, and all at once. Once the popping starts in earnest, gently shake the pan by